Showing posts with label recipes. Show all posts

Monday, February 03, 2014

King Cake Bread Pudding with Whiskey Sauce

There is a restaurant here that serves some of the BEST bread pudding. They always serve a large enough portion to share (which I don't always do!), and the whiskey sauce is just right: not too overpowering; just enough to enhance the flavors of the bread pudding. One of the things they make during Mardi Gras season is king cake bread pudding. I am not exaggerating when I say it truly is one of the best desserts on earth. And, it's one of the things that they make that I'm not too afraid to try my hand at at home. :)

The recipe I found looked pretty good. The blog Raised on a Roux has some great recipes and I knew this one wouldn't steer me wrong. But the first thing I noticed was that it called for a store-bought king cake. Now, I don't have a problem with store bought king cakes but if I can make it myself, I'm going to! I've tried a few recipes over the years, and none of them have worked out the way I wanted them to (mostly because they were really elaborate recipes, and I'm a simple kind of gal). But when I found this one over at The Catholic Foodie, I knew I had found gold.

I made the king cake on Friday, and let it sit in my oven (after the oven had cooled, of course) until Sunday afternoon. The thing about a good bread pudding is that you want the bread to be a little stale so it will soak up more of the milky goodness that makes the pudding part of bread pudding. The only change I made to the king cake recipe was to sprinkle cinnamon on the dough before rolling it all up. I didn't use a filling, and I didn't make the glaze.

I'm not going to duplicate either of the recipes (they're both long!), but I will tell you how I assembled the bread pudding. I did make some changes to the bread pudding recipe, and the whiskey sauce recipe, and I'll note those here, too.

So the king cake sat out for a couple of days. I sprayed a 9x13 glass pan with cooking spray and broke the King cake up into manageable pieces.


After that, I made the milk mix. The recipe from Raised on a Roux calls for:

  • 8 oz cream cheese
  • 2 eggs
  • 2 C half-and-half
  • 14 oz sweetened condensed milk
  • 1 C sugar
  • 2 t cinnamon
  • 2 t vanilla
  • 1 pinch of salt
I chose to eliminate the sweetened condensed milk (and used an extra cup of half-and-half because, well, it was there), and used half of the sugar. I probably used a LOT more cinnamon, too. Once that was all mixed together, I poured it over the king cake.


I let that sit for about an hour, until the bread had soaked up almost all of the milk and then baked it at 350 degrees for about 45 minutes. It came out perfectly.

Another change I made: I didn't make the traditional king cake glaze that the bread pudding recipe called for. I felt like having THAT plus the whiskey sauce was a little overkill. So I made the whiskey sauce out of powdered sugar, melted butter, milk, and vanilla. I don't have exact measurements, but I probably used 2 tablespoons of butter, twice that much milk, a couple of cups of powdered sugar, and a teaspoon of vanilla. I just mixed it all together until it looked like...bread pudding sauce (thick, but able to be poured). I took out about a fourth of this (for those who don't care for whiskey in their sauce, the weirdos), and then added whiskey to the larger portion (again, no measurements, but probably a couple of shots of whiskey). I drizzled that over the warm bread pudding and then sprinkled sugar that I had colored purple, green, and gold (those are the colors of Mardi Gras after all). The end result was delicious!


The only two things I think I would do differently next time is add more cinnamon and use regular milk instead of half-and-half (just for the sake of saving some calories and fat!). And instead of putting the cinnamon in the milk mixture, I would just sprinkle it liberally over the king cake before adding the milk. Lots of it. And maybe a little nutmeg, too!

This was so good. SO good. I can't wait to make it again. BUT, the next thing I'm going to do is make the king cake again...and fill it and glaze it just like it's supposed to be made. Because when we broke up the king cake to put the bread pudding together, we munched on a few pieces and it was amazing. I'm so happy to have found a king cake recipe that is ridiculously delicious.

Monday, July 11, 2011

Lacy Cakes

One of the things I remember about my childhood is how much I loved helping my Daddy cook Saturday morning breakfast. I guess it was an unspoken agreement that he would cook breakfast most Saturdays, and my sisters and I loved to help him mix up the ingredients for whatever it was we were making. Some of the things I remember best are: cheese biscuits, pancakes, and (best of all) lacy cakes. There is something so fun about lacy cakes: the batter is really wet, and you have to stir it well in between each spoonful you spoon out. The sizzle the batter makes when it hits the hot skillet, and the way the milk/egg combo makes the batter wiggle out over the pan to make a ragged circle...I just love everything about it. Best of all: we ate as many as we wanted (or at least it seemed that way - I'm sure it's just that there were so many to be eaten).

I still love hearing my dad say, "Whoooo wants lacy cakes?" But now it's my boys that run to the kitchen to help. I just reap the benefits and eat as many as I can.

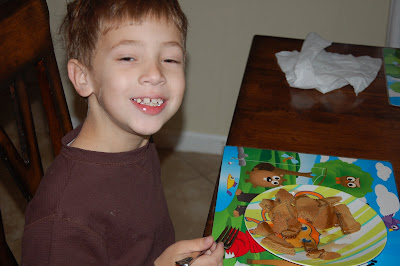
The tradition continues in my kitchen, too. Anthony, Benjamin and I made lacy cakes this morning and they each got to stir the batter, and watch as I spooned the lacy cakes onto the skillet. And Anthony said some of the same things I remember thinking - how fun it is to watch the lacy cake make its shape, and how the sizzle sounds "cool" when the batter hits the skillet.

Anthony ate four lacy cakes this morning, sprinkled with powdered sugar - plus a banana (Benjamin ate two plus a banana). He claims to be full. But I bet he'll eat another one or two later this morning. And I was paid the ultimate compliment: "These taste JUST like the ones Paw Paw makes, Mom!"

I can't wait to give him a copy of the recipe when he's older. I hope he'll have as much fun making them with his kids as I have. And I hope his kids will have as much fun making them with their daddy as I had with mine.

I'm sharing the recipe here. I don't know where he got the recipe from, or I would give credit to the cookbook (it's a good bet that he didn't search the internet for this recipe way back when!). My copy is on a card hand-written by my mom. She gave it to me at one of my wedding showers, and it's laminated in my "Must Keep" recipe binder.

Daddy's Famous Lacy Cakes
Yields: 2 1/2 dozen

2 eggs, well beaten
2 cups milk
1/4 cup vegetable oil
1 1/3 cups yellow cornmeal
3/4 teaspoon salt

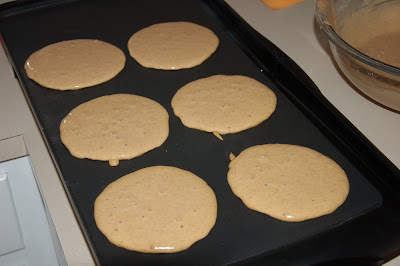
Combine eggs, milk, and oil, mixing well. Combine cornmeal and salt; stir into egg mixture. Stir well. Drop batter by 2 tablespoons full onto hot (medium to medium-high), lightly greased griddle. Stir mixture well each time. Turn cakes when tops bubble and edges look cooked.

Serve hot with butter and powdered sugar. Yummy!

-------------------------------------------------------------------
Things I have watched my dad do, and that I do as well:
-Pour a little vegetable oil into the skillet (griddle) and wipe the skillet with a paper towel to cover it completely with the oil. Save the paper towel and give the skillet a wipe with the oil again in between each round of lacy cakes.
-When the tops of the lacy cakes start to look dry, carefully move the spatula around the edges of the lacy cake to separate it from the skillet, then flip it.
-My dad uses a non-stick skillet; I have no non-stick skillets, so I use a cast iron one. Either works fine. I have had zero success when trying to make them on a metal pan that is not non-stick.

-------------------------------------------------------------------

Thanks, Daddy; for the recipe and the memories.

Saturday, October 30, 2010

Gingerbread Pancakes

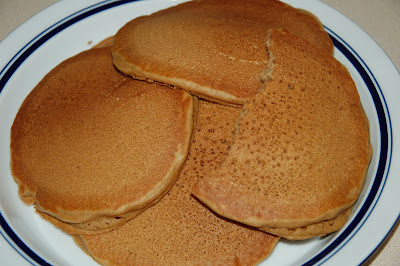
Mark and I found this recipe a long time ago - and we finally tried it out this morning. These pancakes are seriously one of the best things I have eaten in a long time. So. Good.

Naturally, I made some adjustments to the recipe. I'll post my version here, and link to the original at the end.

Gingerbread Pancakes
1 1/2 cups flour
1/2 cup dark brown sugar, packed
1/2 tablespoon baking powder
3/4 teaspoon baking soda
1/2 teaspoon salt
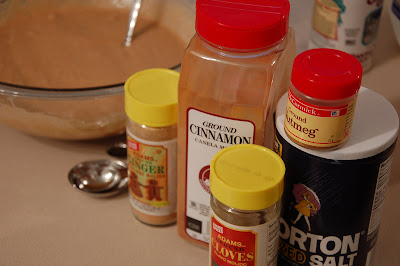
1 teaspoon cinnamon*
1 teaspoon ground ginger*
1/2 teaspoon ground nutmeg
1/4 teaspoon ground cloves
1/2 cup water
1/2 cup brewed coffee, room temperature or cold
1/8 cup milk
1/4 cup butter, melted and cooled
2 large eggs

*I did not measure these out; I tasted the batter and added more as needed. This is how much I think was in there at the end!


Whisk together all dry ingredients in one bowl. In another bowl, mix together all wet ingredients, making sure that the coffee and butter have cooled or they will cook the eggs.

Add the wet ingredients to the dry ingredients and whisk until combined and smooth.

Cook on a non-stick griddle or on a griddle brushed lightly with cooking oil.


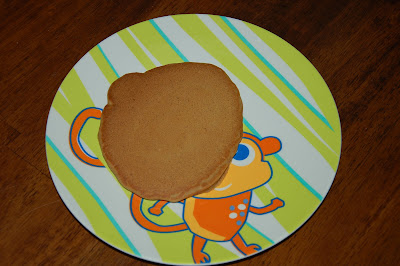
Pay no attention to the half-eaten pancake on top. A cook's gotta taste her work before feeding it to the masses!


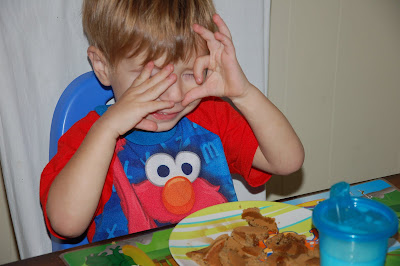
Serve HOT with pure maple syrup to eager children and husband (husband not pictured).


(Recipe adapted from A Cozy Kitchen.)

Saturday, March 27, 2010

Foodies for Thought

Mark and I are still blogging at Foodies for Thought. I'm enjoying trying recipes and selecting the picture(s) Mark takes. It's hard to know how to blog these recipes, though, so I've set up a poll to see how our readers want us to do it.

I personally don't like a lot of pictures clogging up the recipe. I figure folks know what a diced onion and minced garlic look like. And tomato sauce bubbling in a pot? Not so much fun to look at.

Mark thinks that we should blog it step-by-step with photographs like most food bloggers do.

Can you hop on over there to let us know what you think? Or are you even reading over there?

We've had almost 300 hits since we started the blog a month ago...and there are very few recipes featured there so far!

I'm hoping to enhance the blog soon; I want to change the template to something custom-made and I'd like to add more to the sidebar. More recipes, of course, will help, too!

Family update coming soon - not much is going on!

Monday, March 01, 2010

Foodies for Thought

Mark and I have started, together, a new website where we will try out a new recipe (hopefully at least one per week) and post the recipe online. If you're interested, please head on over to Foodies for Thought and check it out! Hopefully, we'll enjoy doing this and will move forward with making it a permanent part of our weekly cooking adventures.

We would love to know what you think of our work-in-progress!

Thursday, January 22, 2009

Chicken Pot Pie

I have always wanted to make up my own recipe, but most of the dinners I make are basic things that I've picked up from my mom and dad: gumbo, spaghetti sauce, red beans and rice. Granted, I've changed some things around and made them my own - but I still don't feel like it's MY recipe.

All of that was a really long way of saying, "I've done it!" We had 10 chicken "fingers" defrosted in the fridge that needed to be used. Anthony, Ben and I were at the grocery store wandering through the frozen foods when I saw a frozen chicken pot pie dinner. So I decided to try to make my own.

I used:
2 store bought pie shells that you fit into your own pie pan
1 bag frozen vegetables (I grabbed one that has peas, green beans, corn, carrots and lima beans)
1/2 of a white onion, diced small
1 handful thinly sliced celery
Chicken stock
Flour
Salt and pepper
Chicken (about 1 pound, I guess)

I browned the onion and celery in some olive oil and then added some flour to make a roux-like paste. When that turned an off-white color, I added enough chicken stock to make a thick gravy. I tossed the veggies in next to defrost them a bit. I salted and pepperd the mixture at this point and let the mixture bubble for a few minutes and then tasted. At the same time, I browned the chicken in a separate pan. When the chicken was just browned, I added it to the other mixture. I laid one pie shell in a greased and floured pie pan and spooned the filling in. On top went the next pie shell, I crimped the edges, cut off the excess and made a few vent holes. If I had had an egg in the house, I probably would have made an egg wash for the top, but alas - no egg. I baked the pie covered with foil for 45 minutes and then for 15 minutes uncovered at 375 F. The top didn't brown like I wanted it to at the end of the hour so I turned on my broiler and took care of that problem!

I have to say that I was VERY satisfied with it. AND Mark and Anthony ate it, too! Mark even choked down the lima beans (no such luck with Anthony on that one). This is definitely a recipe I'll repeat!

Wednesday, August 20, 2008

Easy Baked Ham Sandwich

First, though - Ben sleeping. Obviously not wanting the pacifier this time. He's two months old today! We take him to the pediatrician tomorrow for his check-up and some shots (!). I have a really great picture I'll post tomorrow with his height and weight stats.


--------------------------------------------------------------------------------

Easy Baked Ham Sandwich

Preheat oven to 350 degrees Fahrenheit.

Line cookie sheet with foil.

• 1 loaf of French Bread, halved long-wise
• 1 package Virginia Baked Ham
• 2 cups shredded cheese, of your choice (I usually use Sharp Cheddar)


• 1 stick butter
• 2-3 teaspoons onion, chopped fine
• 2 tablespoons sandwich spread
• 1 teaspoon sugar
• 2 teaspoons poppy seeds

Melt butter in a saucepan and add onion. Cook until onions are translucent. Add sandwich spread, sugar and poppy seeds. Cook until sandwich spread is combined smoothly with butter.


Mark likes to spread a little bit of the butter/sandwich spread mixture on the inside of the French bread; I don't think it makes it taste any differently, but I'll humor the man.

Layer the ham on the bottom half of the French Bread.


Layer the cheese on top of the ham.


Place the top on the bread and pour the butter/sandwich spread mixture over the top.


Top bread with aluminum foil and bake for 15 minutes. Remove foil and bake, uncovered, for 5 minutes.

Slice thickly and enjoy!

Monday, August 18, 2008

Delicious Dark Chocolate Cookies

Mark has an addiction. He is addicted to food blogs. Especially bloggers that write about sweets they've baked. He found a recipe recently that I decided to try out today. I made a few modifications to the recipe before baking them, and then decided that there are a few more I'll make when I make them again. And believe me - I will totally make these again. I thought I'd share the recipe, with my modifications, with all of you.

I want to share more of our successful recipes online. I think it will be a good place for me to look back at our recipes when I'm looking for something special or especially yummy.

So...here you go! Enjoy - and let me know if you try it and whether you like them!

Delicious Dark Chocolate Cookies

Ingredients
• 3/4 cup all purpose flour
• 1/4 cup unsweetened cocoa powder (I used Hershey’s Special Dark cocoa)
• 1/2 teaspoon baking soda
• 1/4 teaspoon salt
• 1/2 cup unsalted butter, room temperature
• 1/2 cup sugar
• 1/2 teaspoon vanilla extract
• 1/2 cup semi-sweet chocolate chips
• 1/4 cup white chocolate chips
• 1/4 cup walnuts

Preparation
Preheat oven to 350 degrees, Fahrenheit.

Grease cookie sheet(s). Whisk flour, cocoa powder, baking soda and salt together in a bowl. Using an electric mixer, beat butter in large bowl until fluffy.

If you have one of these, use it. If you don't have one of these, get one.


To creamed butter, add sugar and vanilla. If you're lucky like me, your husband has made some home-made vanilla, and you'll have that deliciousness to add to your baking.

If you have a husband like mine, use him. If you don't, get one.


Beat the butter, sugar and vanilla until well blended. Add flour mixture and beat until combined. Mix in semi-sweet chips, white chocolate chips and walnuts with a spatula.

I like my cookies small - that way I feel like I can have more. So I rounded about a tablespoon's worth of cookie batter and flattened it into a small round. Doing this yielded about 30 cookies. They do not spread much, so you can put them fairly close to each other on the baking sheet.

Unbaked cookie dough:


Bake cookies about 12 minutes, until center is slightly firm and top is cracked. Cool completely on cookie sheet.

Baked cookies (no, the cookies didn't multiply on the sheet while baking; I took pictures of the two different cookie sheets I was using):


These are the changes I made to the original recipe:
1. The original recipe calls for Old Fashioned Oats. I put them in when I made both batches, but I don't think they brought anything to the cookies. I used 3 tablespoons of oats, even though the recipe called for 2 tablespoons, and I still didn't get anything out of using the oats. So I won't use them next time.

2. The recipe called for espresso powder. While I have no doubt that might be tasty, Mark hates all things coffee, so why would I make cookies that he won't eat? And, if you have a four-year old in the house, there's no reason to make cookies with caffeine in them!

3. The recipe didn't use nuts. But, I love nuts in a cookie. Especially walnuts. So I made half a batch without nuts and half with. The ones with walnuts are MUCH more delicious.

4. The original cooking time was 14 minutes. Usually, I have to cook things at least 5 minutes LONGER than the cooking time a recipe calls for. With these cookies, though, I took two minutes OFF of the cooking time and the cookies weren't as, um, crispy the second time around. They're still crispy, but they're better cooked less time. I bet you could even cook them for 10 minutes and be good to go.